How to Take Product Photos with Your Phone
You do not need a studio or a DSLR to sell online. Here is how to take product photos with your phone at home — plus how AI turns those shots into store-ready images in about a minute.
Ivan Molčan
Founder of Lumepixa. Building AI tools that help e-commerce sellers skip the studio and turn phone shots into store-ready product photos in about a minute.
Why Your Phone Is All You Need for E-Commerce Product Photos
As of 2026, the phone in your pocket has a better camera than professional DSLRs from a decade ago — and you can shoot an entire product catalog from your kitchen table. A few years back, selling online meant renting a studio or paying a photographer $25-50 per image. That barrier kept a lot of great products off the shelves. It is no longer true.
Modern smartphones like the iPhone 12 and newer, Pixel 6+, and Samsung Galaxy S21+ capture 12-48 megapixel images with excellent dynamic range, sharp detail, and accurate color. That is more than enough resolution for every major e-commerce platform — Amazon requires 2000x2000px, Shopify recommends 2048x2048px, and Etsy suggests 2000x2000px. Your phone already shoots at higher resolution than all of these.
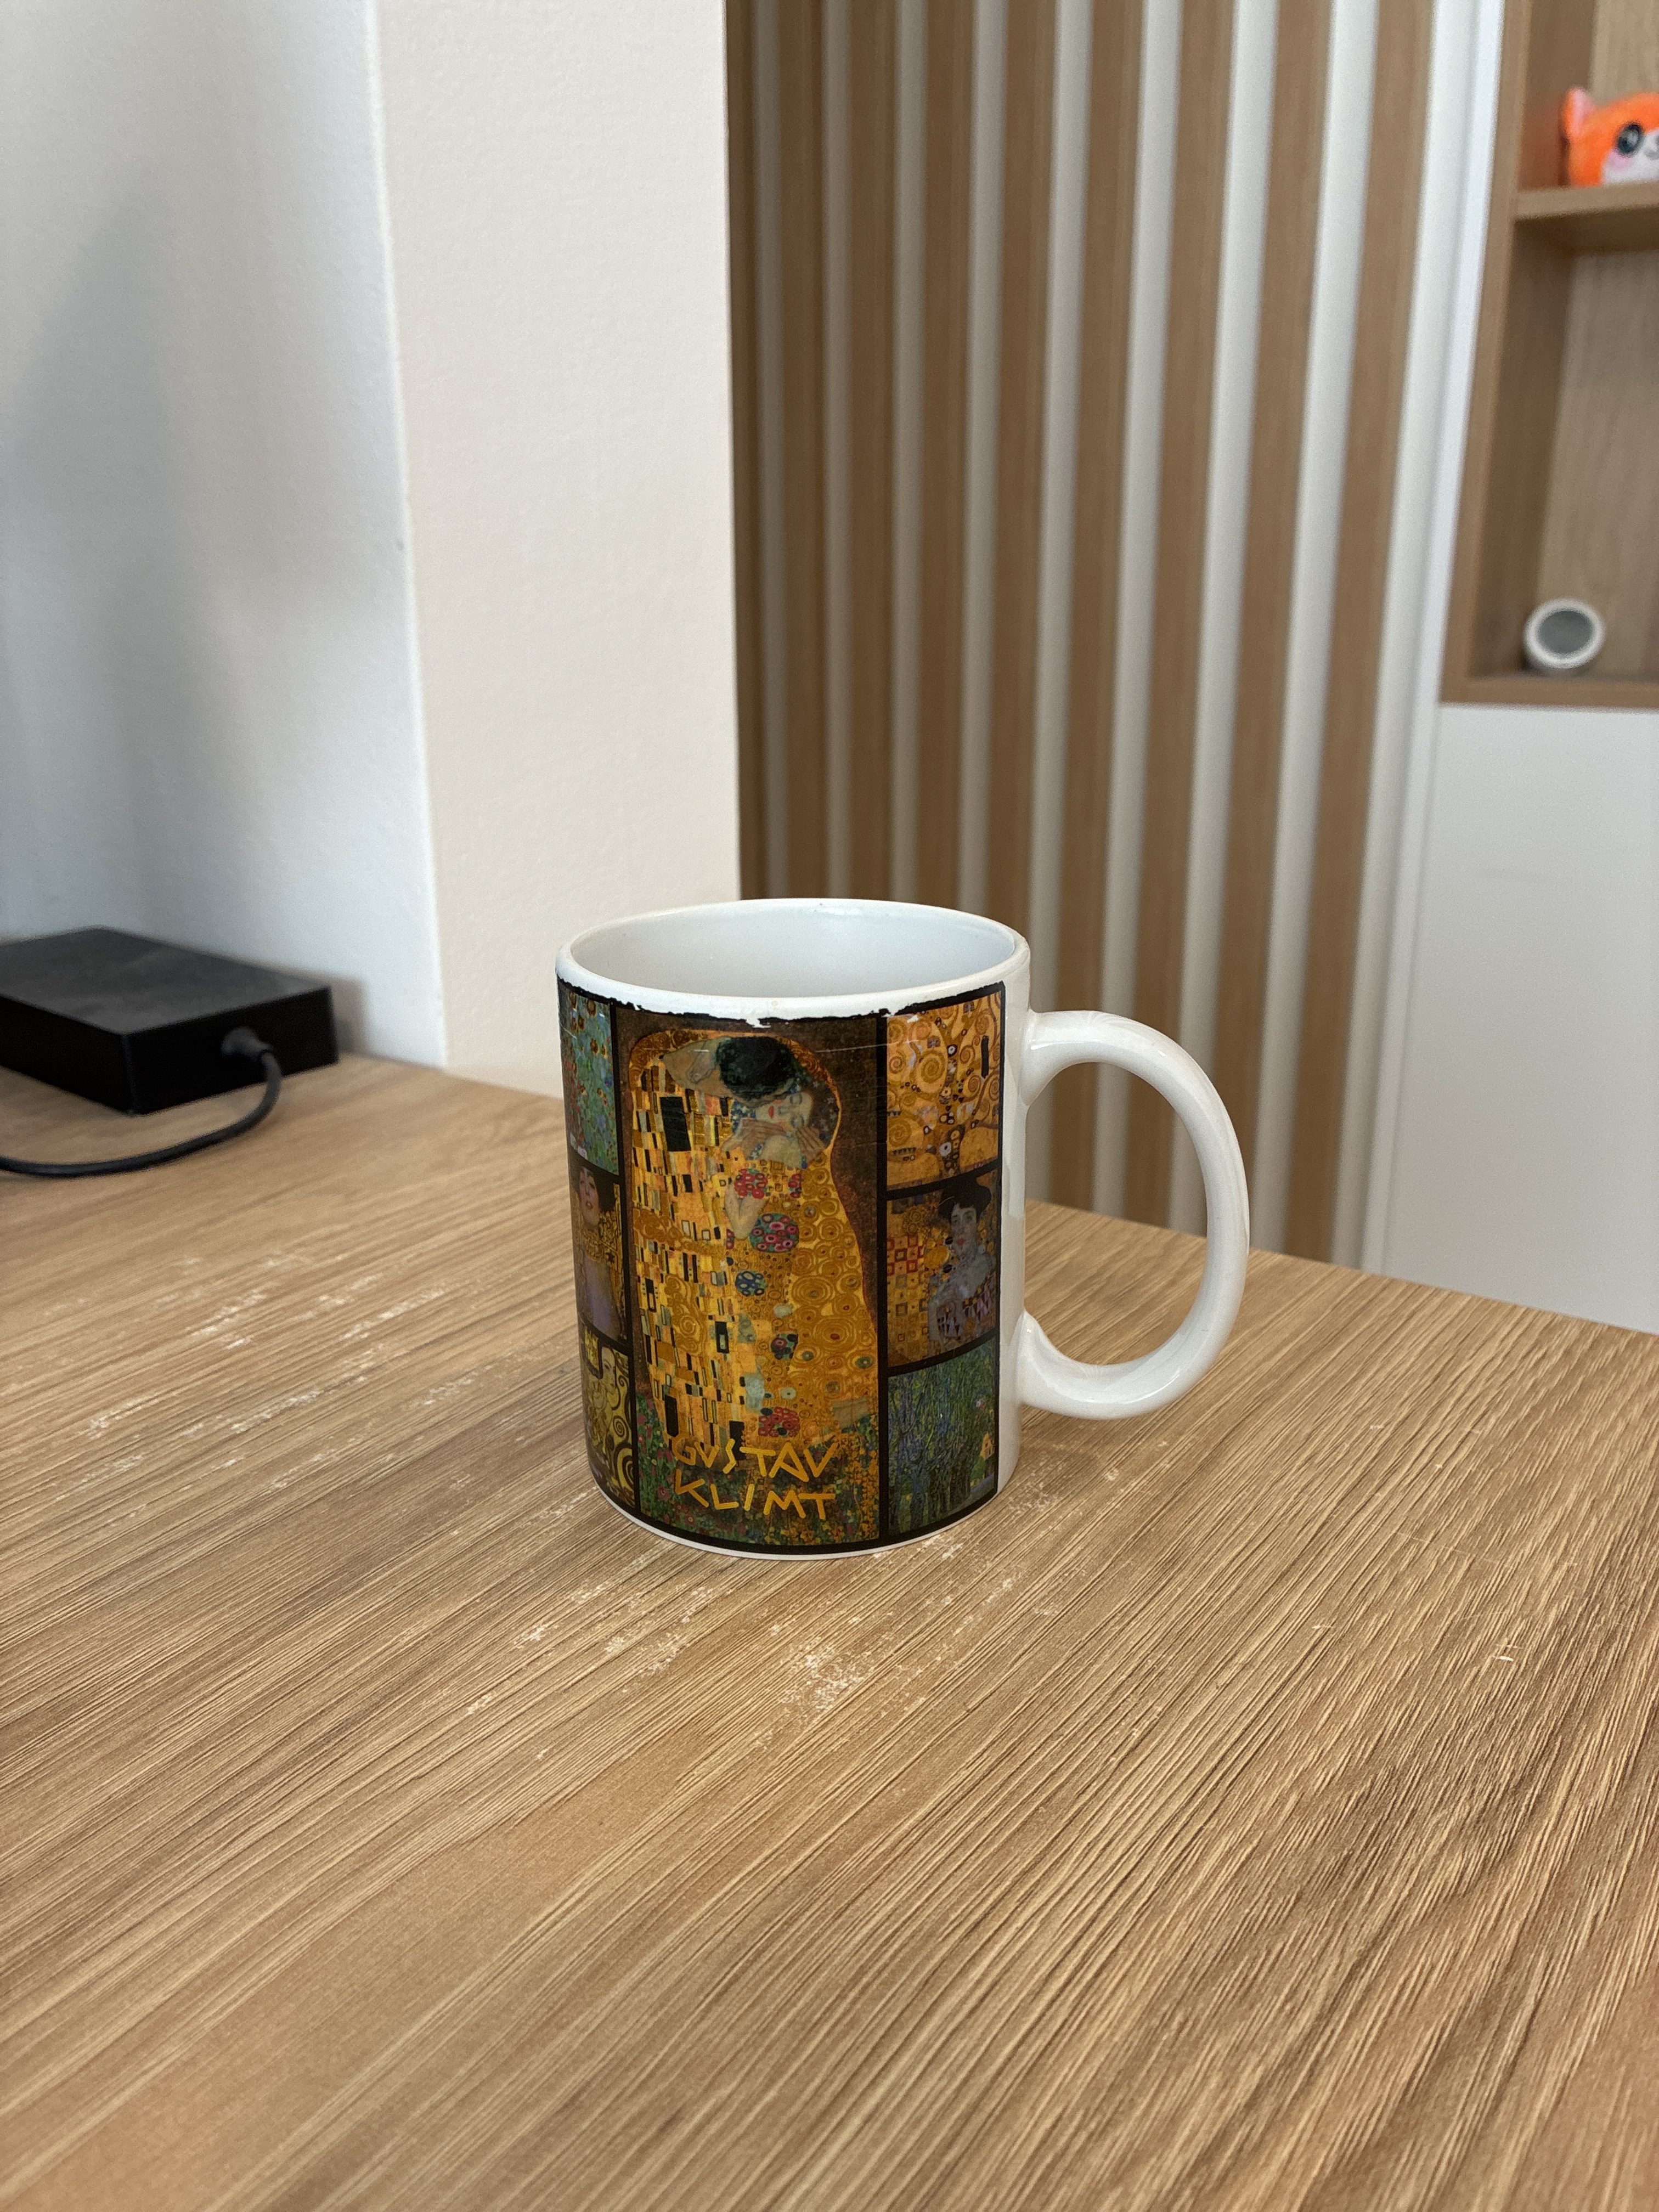
Across the phone photos sellers run through Lumepixa, the pattern is consistent: the camera is rarely the bottleneck. What separates amateur phone photos from store-ready product shots is lighting, background, composition, and post-processing. This guide walks through exactly how to take product photos with your phone at home — plus how AI tools close the gap between a phone snapshot and a professional listing image. For a detailed walkthrough of every step, see our complete phone photography guide.
Phone Camera Settings for Product Photography
Before you press the shutter, spend two minutes dialing in your phone camera settings. Most sellers skip this step and then wonder why their photos look soft or off-color. The defaults are optimized for vacation snapshots, not for DIY product photography.
Shoot at maximum resolution. On iPhone, open Settings → Camera → Formats → choose "Most Compatible" (JPEG) if you plan to upload directly, or "High Efficiency" (HEIC) if you will edit first. Turn on ProRAW if your iPhone supports it — the extra detail helps if you need to crop or correct exposure later. On Android, set your camera to the highest megapixel mode (often labeled "Pro" or "High Res") and turn off any "scene optimization" that auto-adjusts colors.
Lock focus and exposure. Tap and hold on your product in the camera app until you see "AE/AF Lock". This stops the camera from re-focusing or changing brightness between shots, which is critical when you are photographing a whole catalog and need consistent results. For a deeper walkthrough of every camera setting, see our phone photography guide.
Turn off the flash. Always. The built-in flash creates harsh shadows, blown-out highlights on glossy products, and unnatural color casts. Natural light or continuous lamps produce far better results.
Use the main (1x) lens, not the wide-angle. Ultra-wide lenses distort straight edges and make products look warped — especially noticeable on boxes, bottles, and anything with parallel lines. Step back physically and crop in later rather than zooming with the wide lens.
Shoot with a timer or headphone volume button to avoid camera shake. Even a tiny bit of hand motion softens fine details like stitching, labels, and textures — exactly the details buyers zoom in on before deciding to purchase. Sharp edges also matter for clean AI background removal later.
Lighting: The Difference Between Amateur and Store-Ready
Lighting is the single biggest factor in smartphone product photography. Great lighting makes a phone photo look like a studio shot. Bad lighting makes even a $2,000 DSLR photo look amateur. If you take one thing from this guide, make it this: fix your lighting before worrying about anything else.
The easiest and cheapest option is a large window with indirect daylight. North-facing windows (in the northern hemisphere) give the most consistent, soft light throughout the day. Position your product a foot or two from the window, with the window to one side — never directly behind the camera, which flattens the image, and never behind the product, which creates backlight silhouettes.
Avoid direct sunlight. It creates harsh shadows, blown-out highlights on glossy surfaces, and unflattering color temperatures. Overcast days are actually the best light for product photography at home — the clouds act as a giant softbox, diffusing sunlight evenly across your product.
Fill the shadow side. The window lights one side of your product; the other side falls into shadow. Place a white piece of paper, foam board, or even a white bed sheet on the shadow side to bounce light back onto the product. This single trick takes phone photos from "okay" to "professional" instantly.
If you do not have good window light, invest in two inexpensive LED panel lights or desk lamps with daylight-balanced bulbs at 5000-5600K (see color temperature for the technical background). Position one at 45 degrees to the product as your key light, and one on the opposite side at lower intensity as fill. Total cost: $30-60. This beats any natural light setup on cloudy days or at night.
Keep color temperature consistent across every product in your catalog. Nothing destroys a Shopify collection grid faster than some photos looking warm-yellow and others looking cool-blue. Shoot in the same location at the same time of day, or use the same artificial lights every time.
Backgrounds and Surfaces: Setting Up a DIY Home Studio
You do not need a real studio — you need a clean surface and a clean backdrop. Here is how to set up DIY product photography at home in under five minutes.
- Phone — $0 (you already own it)
- White poster board — $2-5 at any office supply store
- Foam board reflector — $3-8
- Mini phone tripod — $15-25
- LED desk lamps (optional, for nighttime) — $20-40 for a pair
- Complete DIY phone product photography setup — under $50 total
For white-background shots (Amazon, Walmart, eBay, TikTok Shop), use a large sheet of white poster board or matte photo paper. Curve it up against a wall so there is no visible seam where the floor meets the wall — this is called a "sweep" and it creates the infinite-white-background look you see on every Amazon listing. A pre-made portable sweep kit runs $20-40 online.
For lifestyle and artisan shots (Etsy, Instagram Shopping, Shopify brand stores), use natural surfaces that match your product aesthetic. Wooden cutting boards, marble countertops, linen tablecloths, rustic tabletops, concrete tiles, and neutral rugs all work. Match the surface to your brand — warm wood for handmade ceramics, cool marble for skincare, textured linen for textile goods. Our Etsy photography guide has more on matching surfaces to handmade aesthetics.
Keep props minimal. A single complementary prop can add context (a coffee bean next to a mug, a lemon slice next to a candle). Three props compete with the product. Five props are clutter. The product is the hero; everything else supports it.
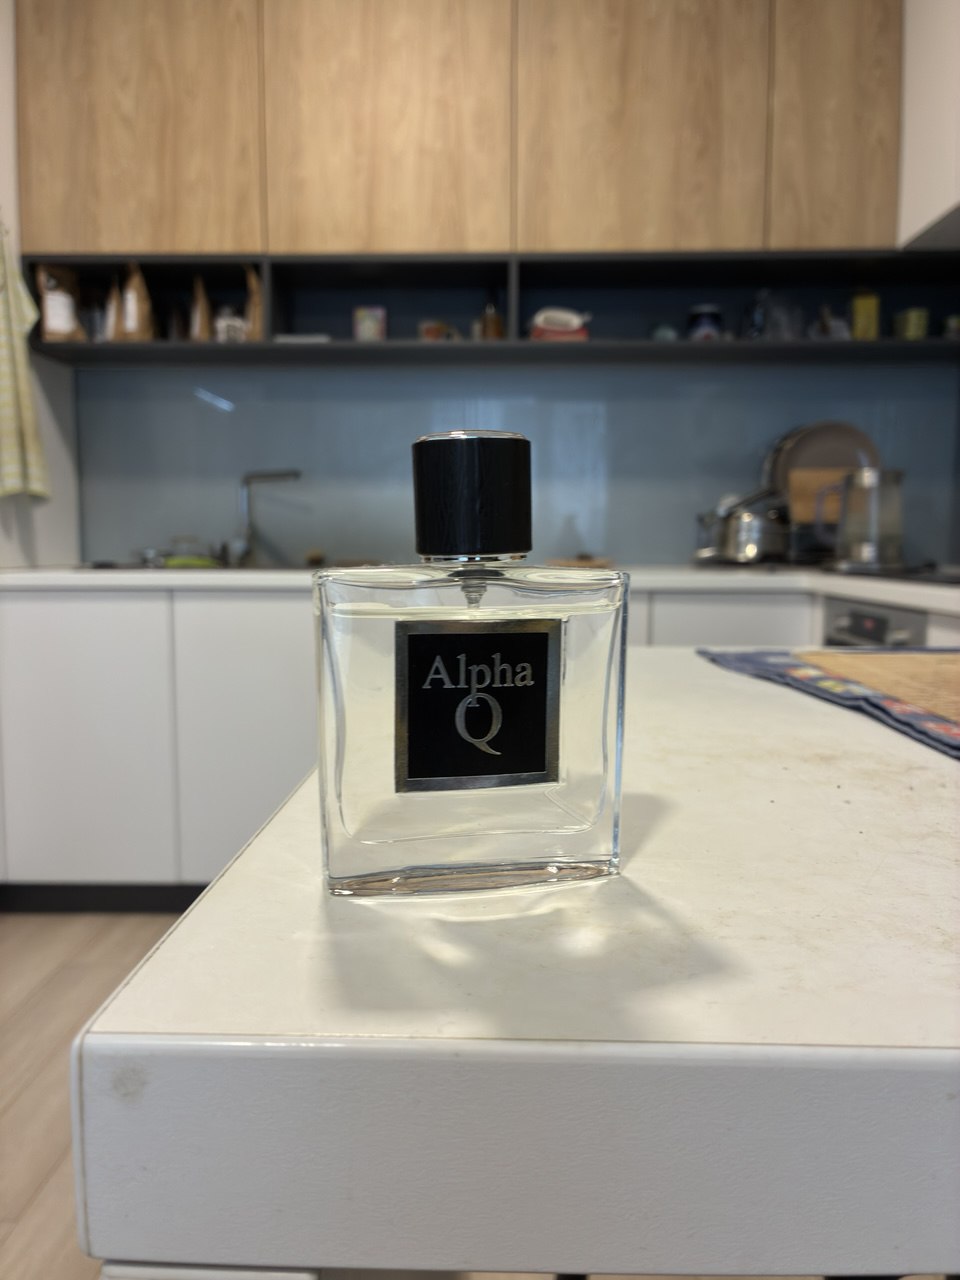
Here is the biggest shortcut in modern DIY product photography: if you plan to process the photo with Lumepixa afterward, the background does not matter at all. Shoot on your kitchen counter, on a messy desk, on a towel — AI removes it and generates a clean or lifestyle background in about a minute. You can try it free with 3 credits on signup, no subscription. More on this in the final section.
Composition, Angles, and Product Type Tips
Different products need different camera angles. Here is a quick reference for common product types you might sell on Shopify, Etsy, Amazon, or any other platform.
Small products (jewelry, cosmetics, candles, accessories): Shoot from directly above (flat-lay) or at a slight 15-30 degree angle. Flat-lays work especially well for jewelry and cosmetics because they eliminate perspective distortion. Use a tripod or phone mount — handheld flat-lays almost always have slight tilt that looks amateur. Phone tripods with adjustable arms cost $15-25.
Medium products (mugs, bottles, books, ceramics, small electronics): Shoot at eye level — roughly halfway up the product. Step back and use the main 1x lens rather than getting close with the wide angle. Shoot three standard angles: straight-on front, three-quarter (45 degrees), and side profile. Add a detail shot focused on the logo, label, or craftsmanship.
Large products (bags, clothing, home goods, furniture): Shoot slightly above eye level, angled slightly down. For clothing, use a mannequin, a flat-lay, or a hanger against a clean wall — avoid shooting clothes wrinkled on a bed. For bags and larger accessories, shoot both closed and open to show interior features.
Reflective products (glass, metal, glossy ceramics, jewelry): These are the hardest to photograph with a phone. The reflective surface picks up everything around it — your hands, your phone, the lamp, the window. Shoot in a "light tent" (a cheap white fabric cube that surrounds the product) to eliminate reflections. Light tents cost $15-30 online.
Fill the frame. Your product should occupy 80-90% of the image for marketplace listings. Empty space around the product makes it look small in collection grids and search results. Crop tight, or better, compose tight in-camera so you do not lose resolution cropping later. For large catalog displays and zoom-in detail, consider generating 4K product photos from your phone shots.
Take more shots than you think you need. Shoot 20-30 frames per product — different angles, different framings, different focus points. It is far easier to pick the best 5-7 later than to set everything up again because you missed a key angle.
Common Phone Product Photography Mistakes
These are the mistakes we see most often from sellers just starting DIY product photography at home. Avoid all of them and your photos will already be ahead of most small-seller listings.
- Using the flash. The built-in phone flash is the single worst thing you can do to a product photo. It creates harsh shadows, hot spots on glossy surfaces, and unflattering color casts. Always turn the flash off.
- Shooting with the wide-angle lens. Phone wide-angle lenses distort straight lines and make products look warped. Always use the main 1x lens. Step back physically if you need more of the scene in frame.
- Handheld shooting for small products. Tiny camera shake softens fine details. Use a cheap tripod, a stack of books, or even prop the phone against a cup — anything to stabilize the shot.
- Inconsistent lighting between products. Shooting some products in the morning and others at night creates a catalog full of mismatched colors. Pick one time of day or one artificial lighting setup and use it for every product — this consistency is what separates amateur catalogs from professional Shopify stores.
- Dirty products. Camera sensors pick up dust, fingerprints, and smudges that your eye does not notice. Wipe every product with a microfiber cloth right before shooting. This is the fastest, cheapest quality improvement you can make.
- Low resolution output. Some phones default to lower-resolution modes to save space. Check your camera settings and shoot at full resolution — especially if you want 4K product photos that hold up to zoom on desktop displays.
- Bad white balance. Mixing daylight with tungsten (indoor yellow bulbs) creates weird color casts that are hard to fix. Turn off all indoor lights when shooting by window, or use only artificial daylight-balanced LEDs (5000-5600K).
- No post-processing. A raw phone photo almost never looks store-ready straight out of the camera. At minimum, crop tight, straighten, adjust exposure, and clean up the background. Better yet, let AI handle all of this automatically — which brings us to the next section.
From Phone Photo to Store-Ready: How AI Fills the Gap


Here is the honest truth about DIY phone product photography in 2026: even with perfect lighting, a clean background, and good composition, a raw phone photo is not a listing-ready image. It still needs background cleanup, color correction, precise sizing for each platform, and consistency across your catalog. That is where AI product photography tools come in.
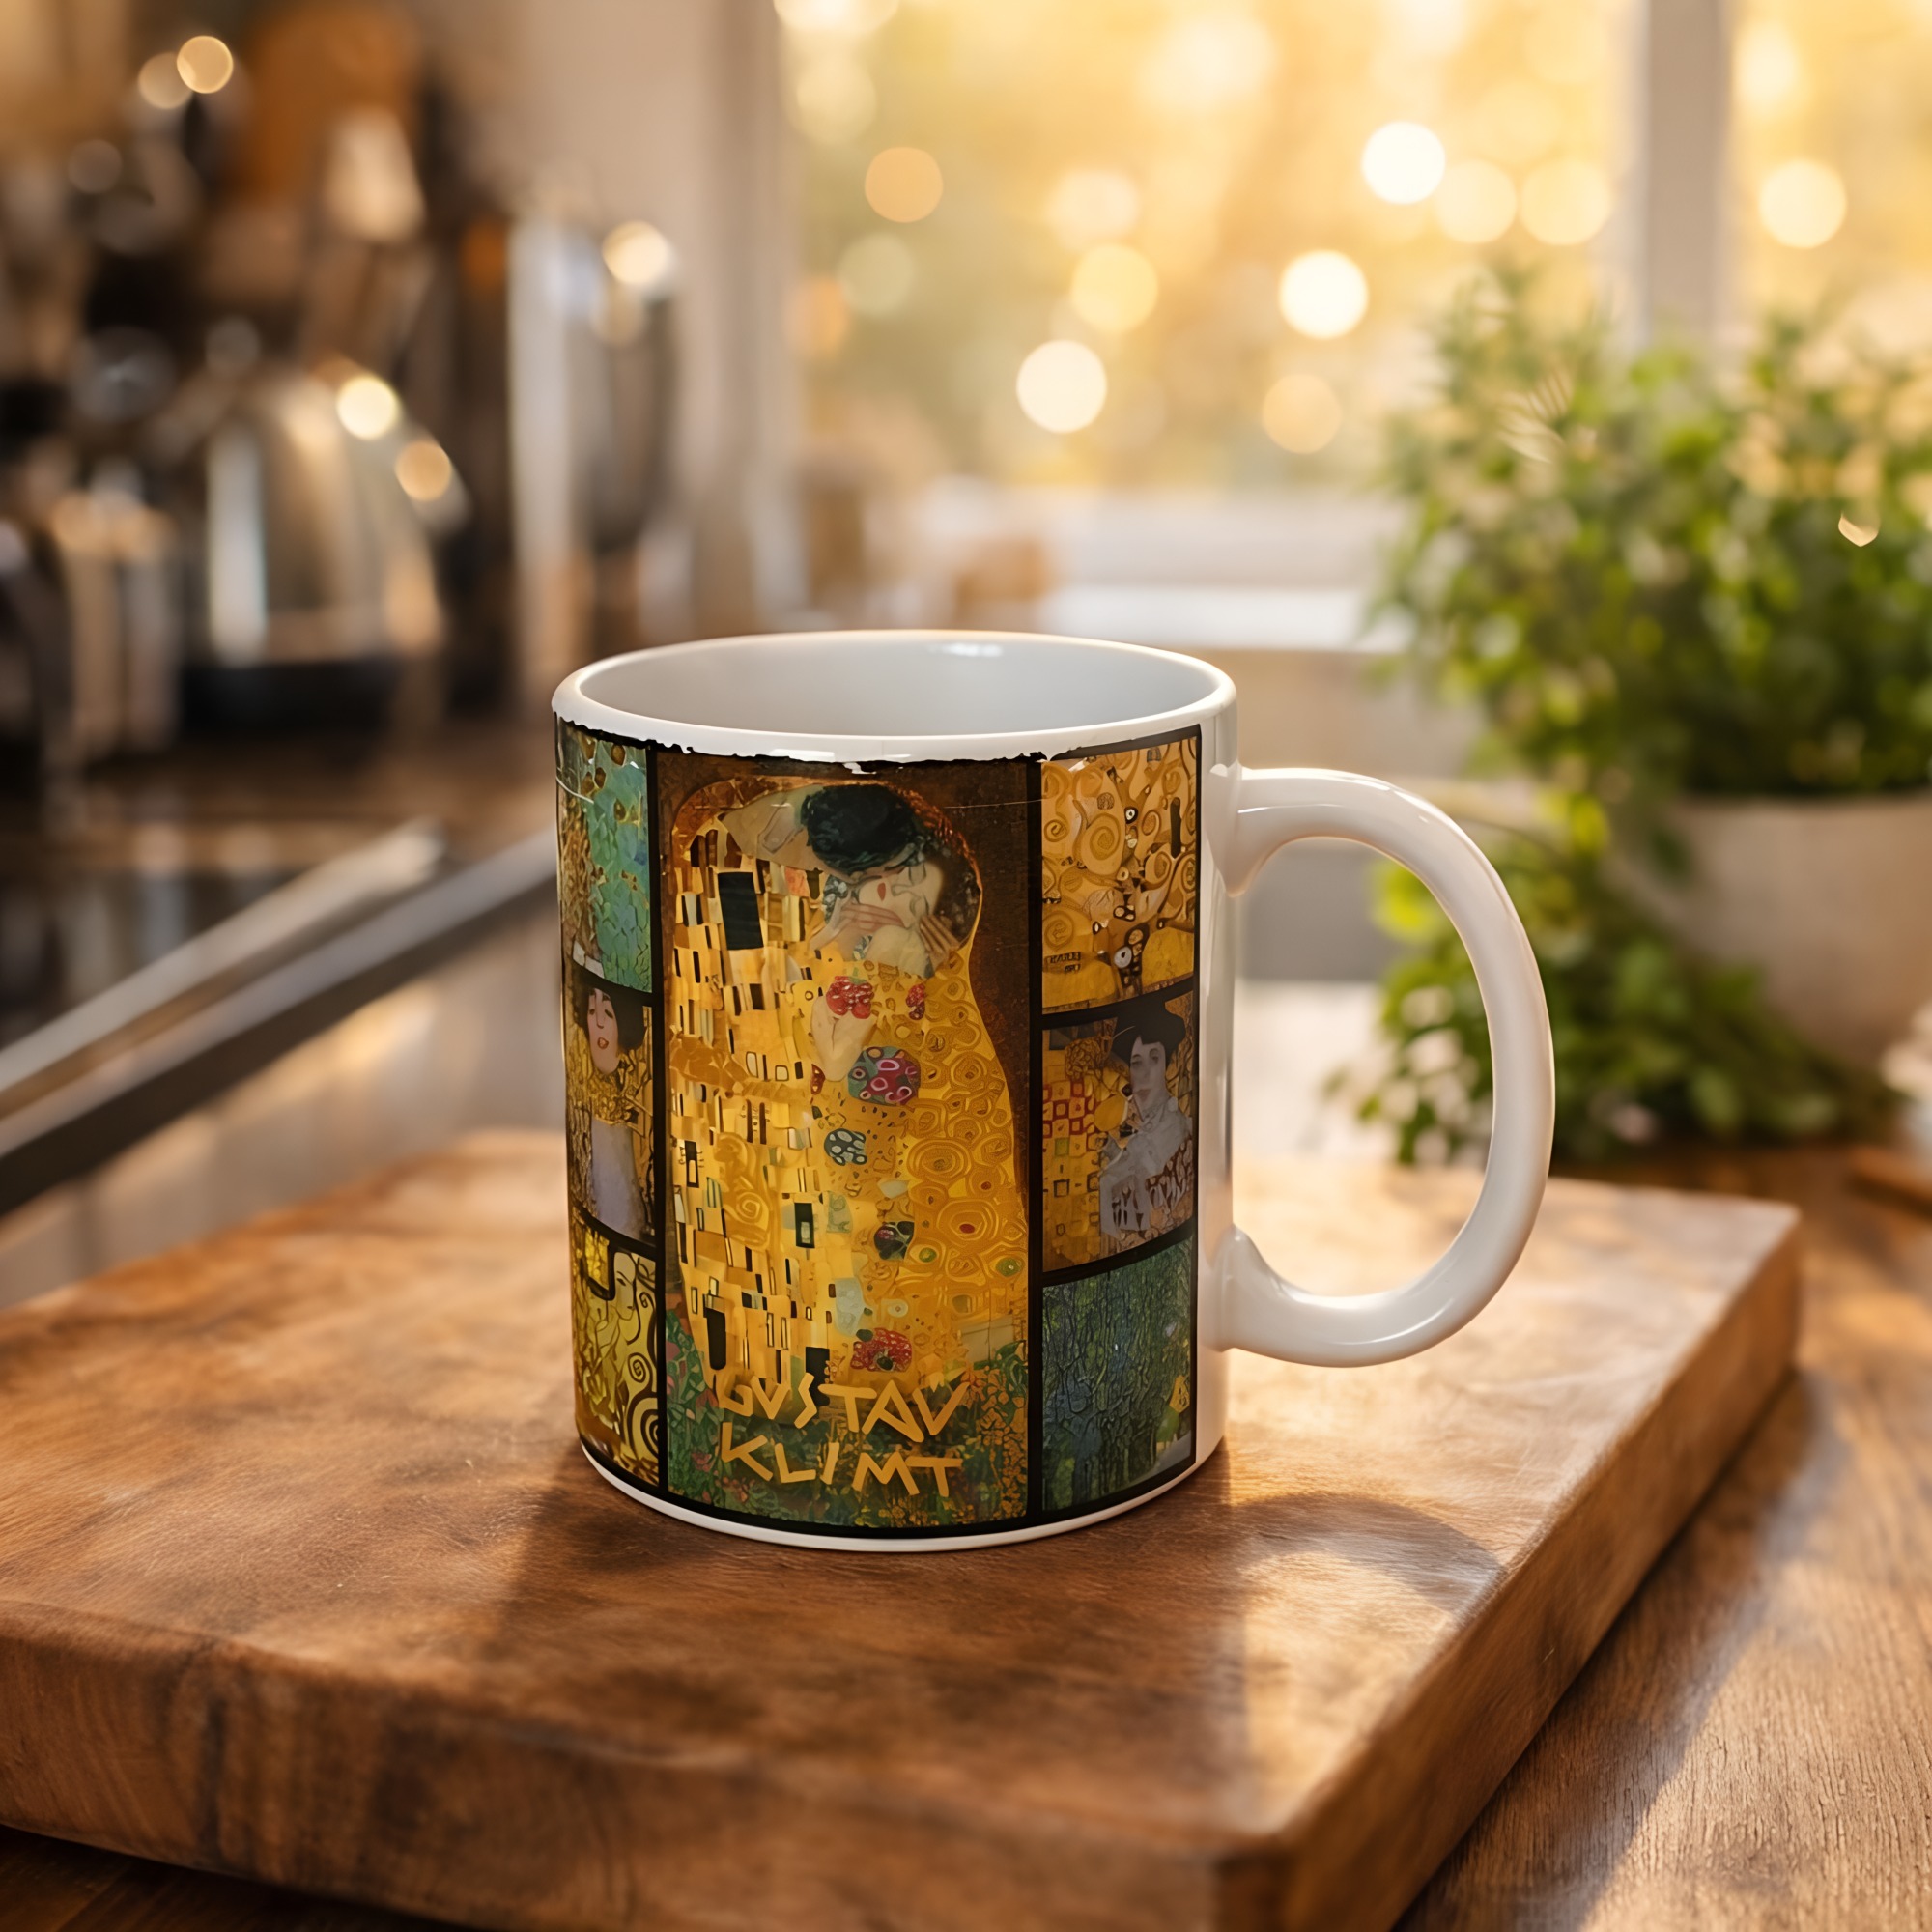
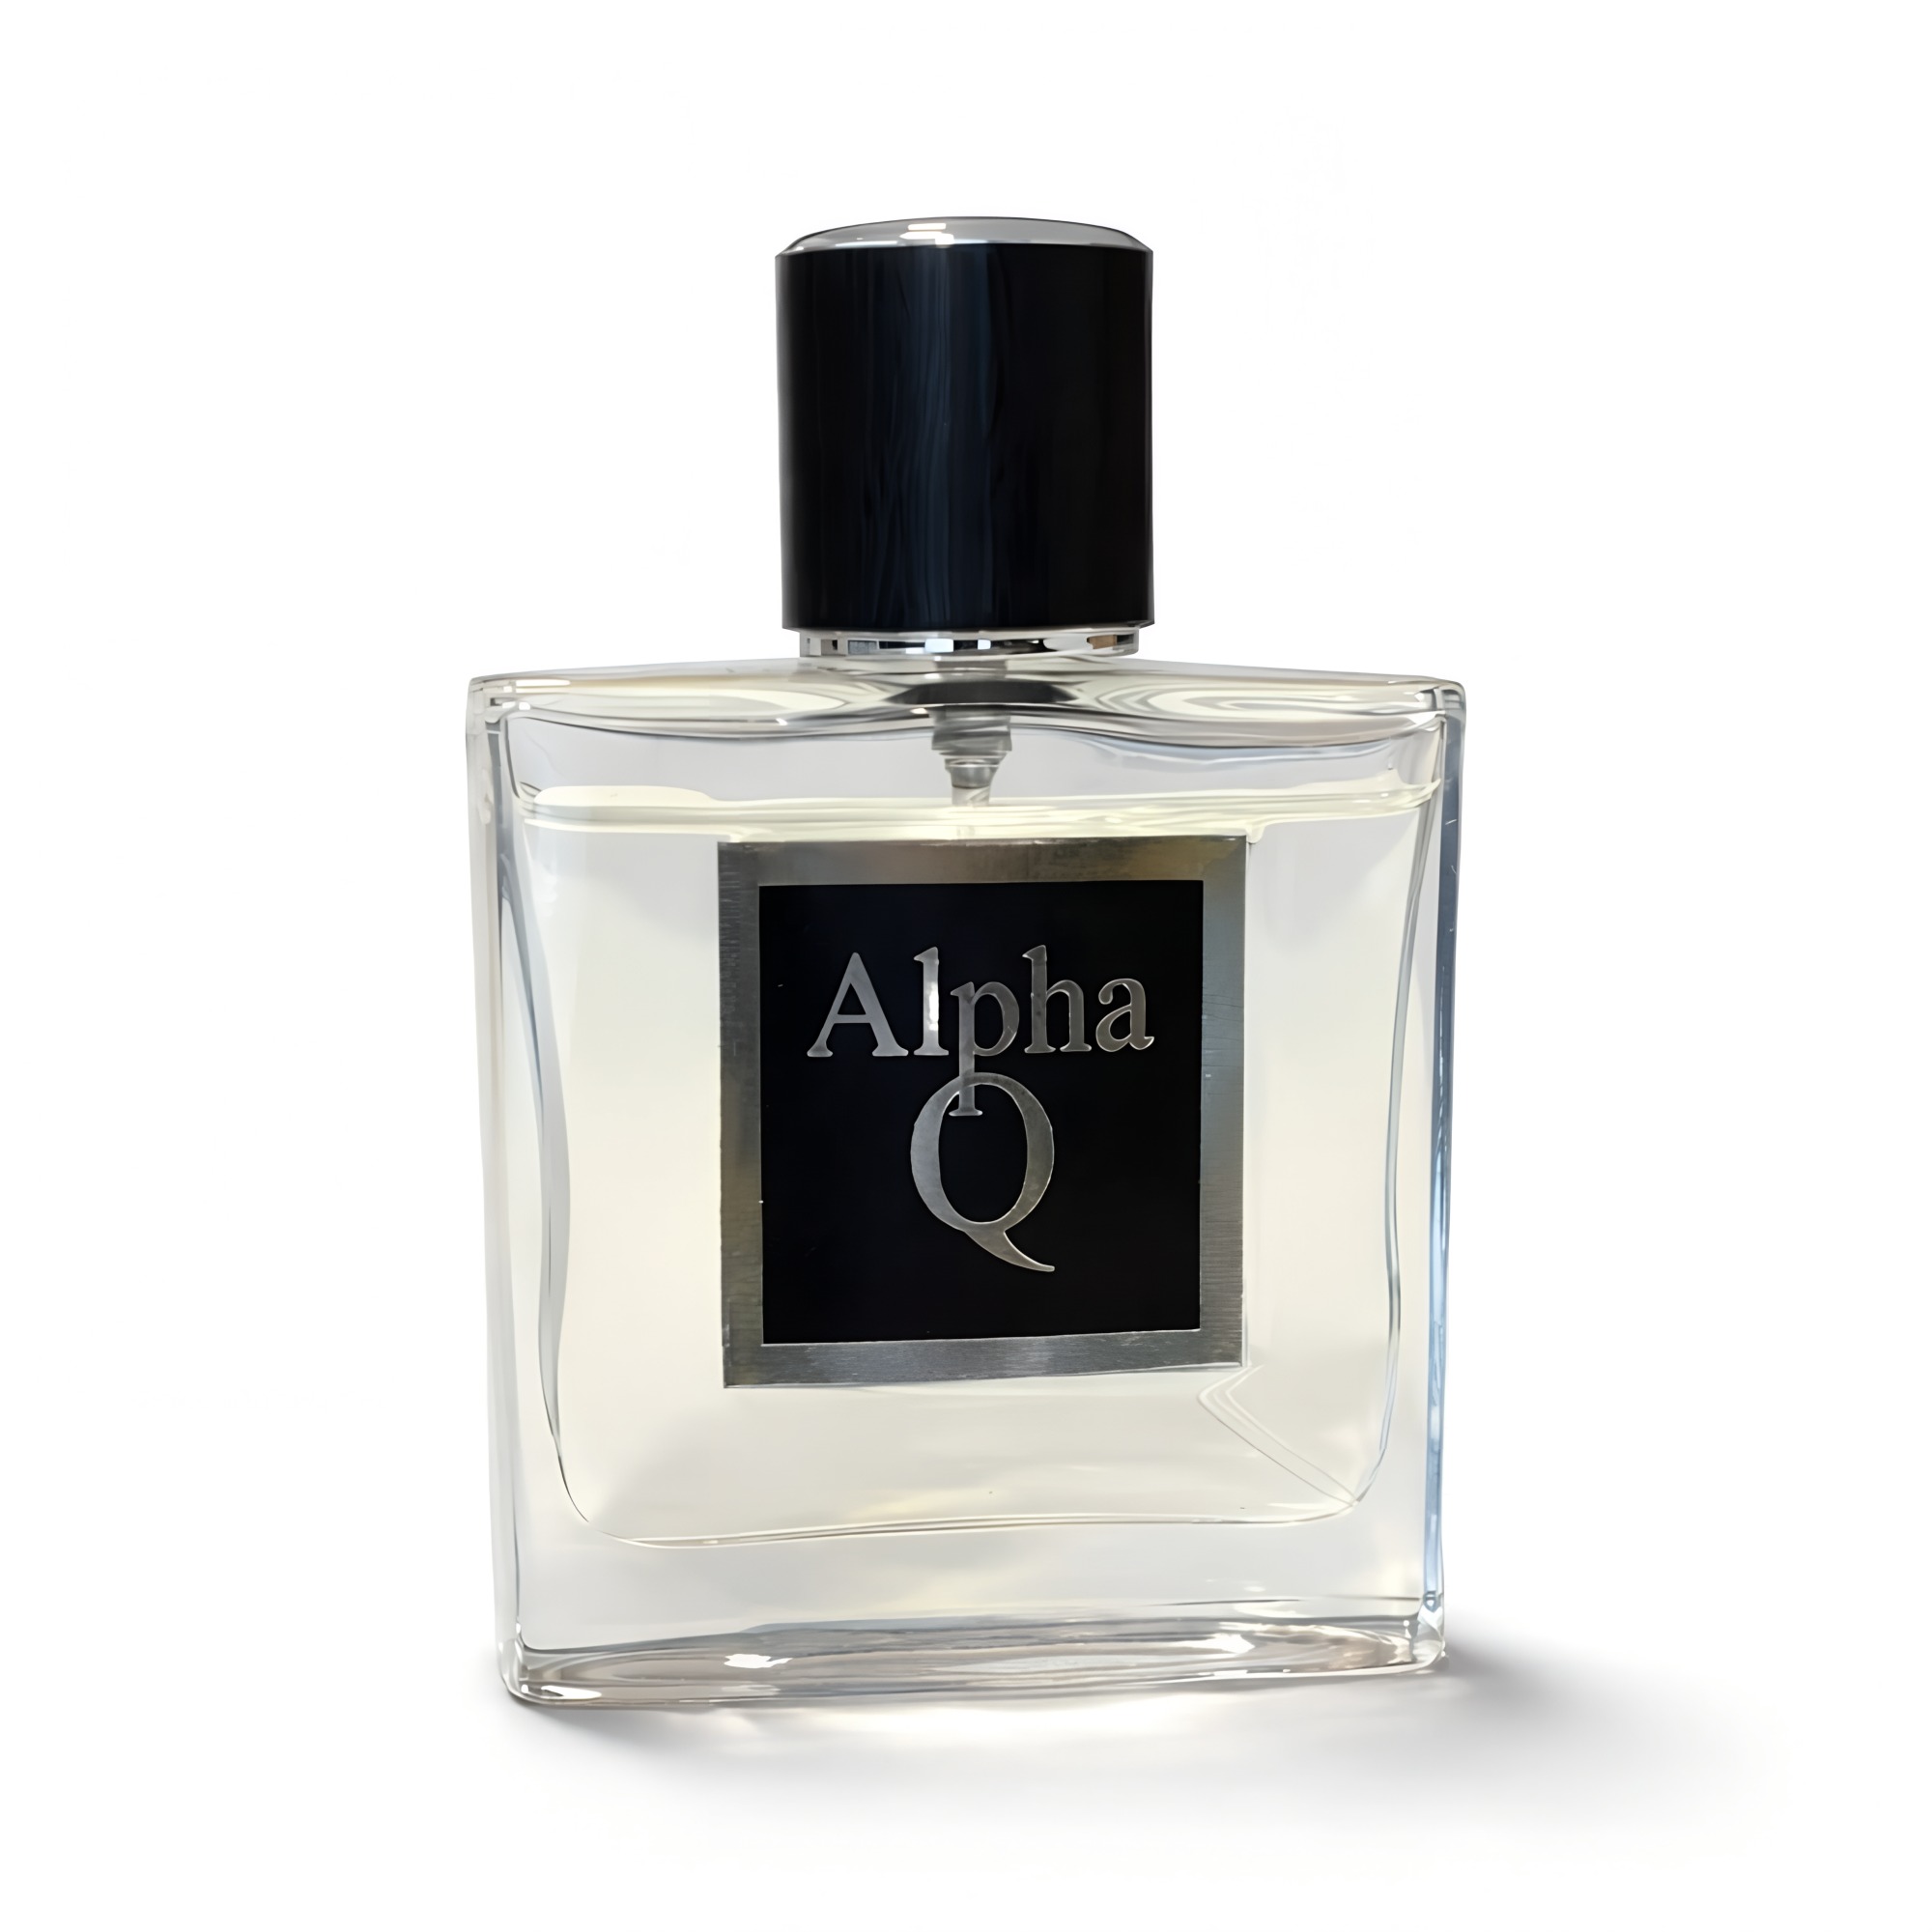
With Lumepixa, the workflow looks like this: take a phone photo of your product on any background (your desk, kitchen counter, a piece of paper — it does not matter), open the app, pick a platform preset (Amazon main, Shopify, Etsy lifestyle, eBay, Walmart, TikTok Shop, Instagram Shopping, and more), and get a store-ready image back in about a minute. The AI detects your product, removes the background, generates a clean or lifestyle scene, and upscales the final image to the exact resolution that platform needs.
This changes phone product photography from a technical skill into a two-step process: get a reasonably sharp, well-lit phone photo of your product, then let AI handle the background, scene, and formatting. The lighting and focus still matter (AI cannot rescue a blurry, underexposed snapshot), but backgrounds, color correction, sizing, and cross-platform consistency are fully automated. Learn more about background removal for product photos and how it fits into a modern photography workflow.
The cost comparison is striking. Traditional studio photography runs $20-50 per image. AI photography with Lumepixa costs 1-2 credits per image, with 3 free credits on signup and no subscription. For a full breakdown, see our AI vs professional photography cost comparison. This is part of a bigger shift covered in how AI is changing e-commerce photography.
If you sell on multiple platforms, this is especially valuable — one phone photo generates different platform-specific images (white background for Amazon, 2200x2200 LQS-friendly for Walmart, clean neutral for Shopify, lifestyle scene for Etsy, or multi-angle 1600x1600 for eBay) from the same source. See how Lumepixa compares to other tools: vs PhotoRoom, vs Remove.bg, vs Canva, vs Pixelcut, vs Pebblely, vs Flair.ai. No subscription required — just buy credit packs as needed.
Frequently Asked Questions
Can you take professional product photos with a phone?
What is the best phone camera setting for product photography?
What is the best lighting for DIY product photography at home?
Do I need a white background for phone product photos?
How do I make phone photos look professional for Amazon and Shopify?
What is the cheapest way to do product photography at home?
Try Lumepixa Free
Download Lumepixa and get 3 credits to try with your own products. No subscription.
More from the Blog
AI vs Professional Product Photography: Cost Comparison
Professional product photography costs $20-50+ per image. AI tools like Lumepixa can produce comparable results for a fraction of the price. Here is a detailed cost breakdown.
Amazon Product Photography Guide 2026
Everything you need to know about Amazon product photography in 2026 — image requirements, best practices, and how AI tools make it easier than ever.
How AI Is Changing E-Commerce Product Photography
AI product photography is transforming e-commerce. Automatic background removal, scene generation, and platform optimization are making professional product photos accessible to every seller.
Product Photo Background Removal: Complete Guide
Background removal is the most important step in product photography. Learn when you need a white background, when lifestyle scenes work better, and how AI tools handle it automatically.
Etsy Product Photography Guide 2026
Etsy buyers expect warm, artisan-style product photos — not sterile white backgrounds. Learn the image sizes, styling tips, and tools that help your listings stand out.
Shopify Product Photography: Requirements & Best Practices
Shopify gives you full control over your product images — but that flexibility means the quality is entirely on you. Learn the recommended sizes, optimization tips, and how to create store-ready photos.
eBay Product Photography Guide 2026
Everything you need to know about eBay product photography in 2026 — image sizes, the 24-photo limit, multi-angle strategy, and how AI turns phone shots into listing-ready images in about a minute.
TikTok Shop Product Photography Guide 2026
Everything you need to know about TikTok Shop product photography in 2026 — image sizes, white background rules, mobile-first composition, and how AI turns a phone shot into a listing-ready image in about a minute.
Walmart Product Photography Guide 2026
Everything you need to know about Walmart Marketplace product photography in 2026 — the 2200x2200 white-background rule, the Listing Quality Score, the 8-photo strategy, and how AI turns one phone shot into a Walmart-ready image in about a minute.
AI Product Photography Statistics 2026: What Every E-Commerce Seller Needs to Know
A comprehensive, data-backed look at AI product photography in 2026. 40+ statistics covering market size, seller adoption, cost savings, conversion rates, consumer behavior, and platform requirements — all with original sources.
E-Commerce Product Image Statistics 2026: How Photos Impact Sales
How do product images affect e-commerce sales? 35+ verified statistics covering conversion rates, return rates, mobile shopping behavior, image quantity, quality benchmarks, and platform requirements — all with original sources.
Amazon Seller Statistics 2026: Costs, Competition & Growth
9.7 million sellers, $700 billion revenue, 58% profitable in year one. 25+ verified Amazon seller statistics for 2026.